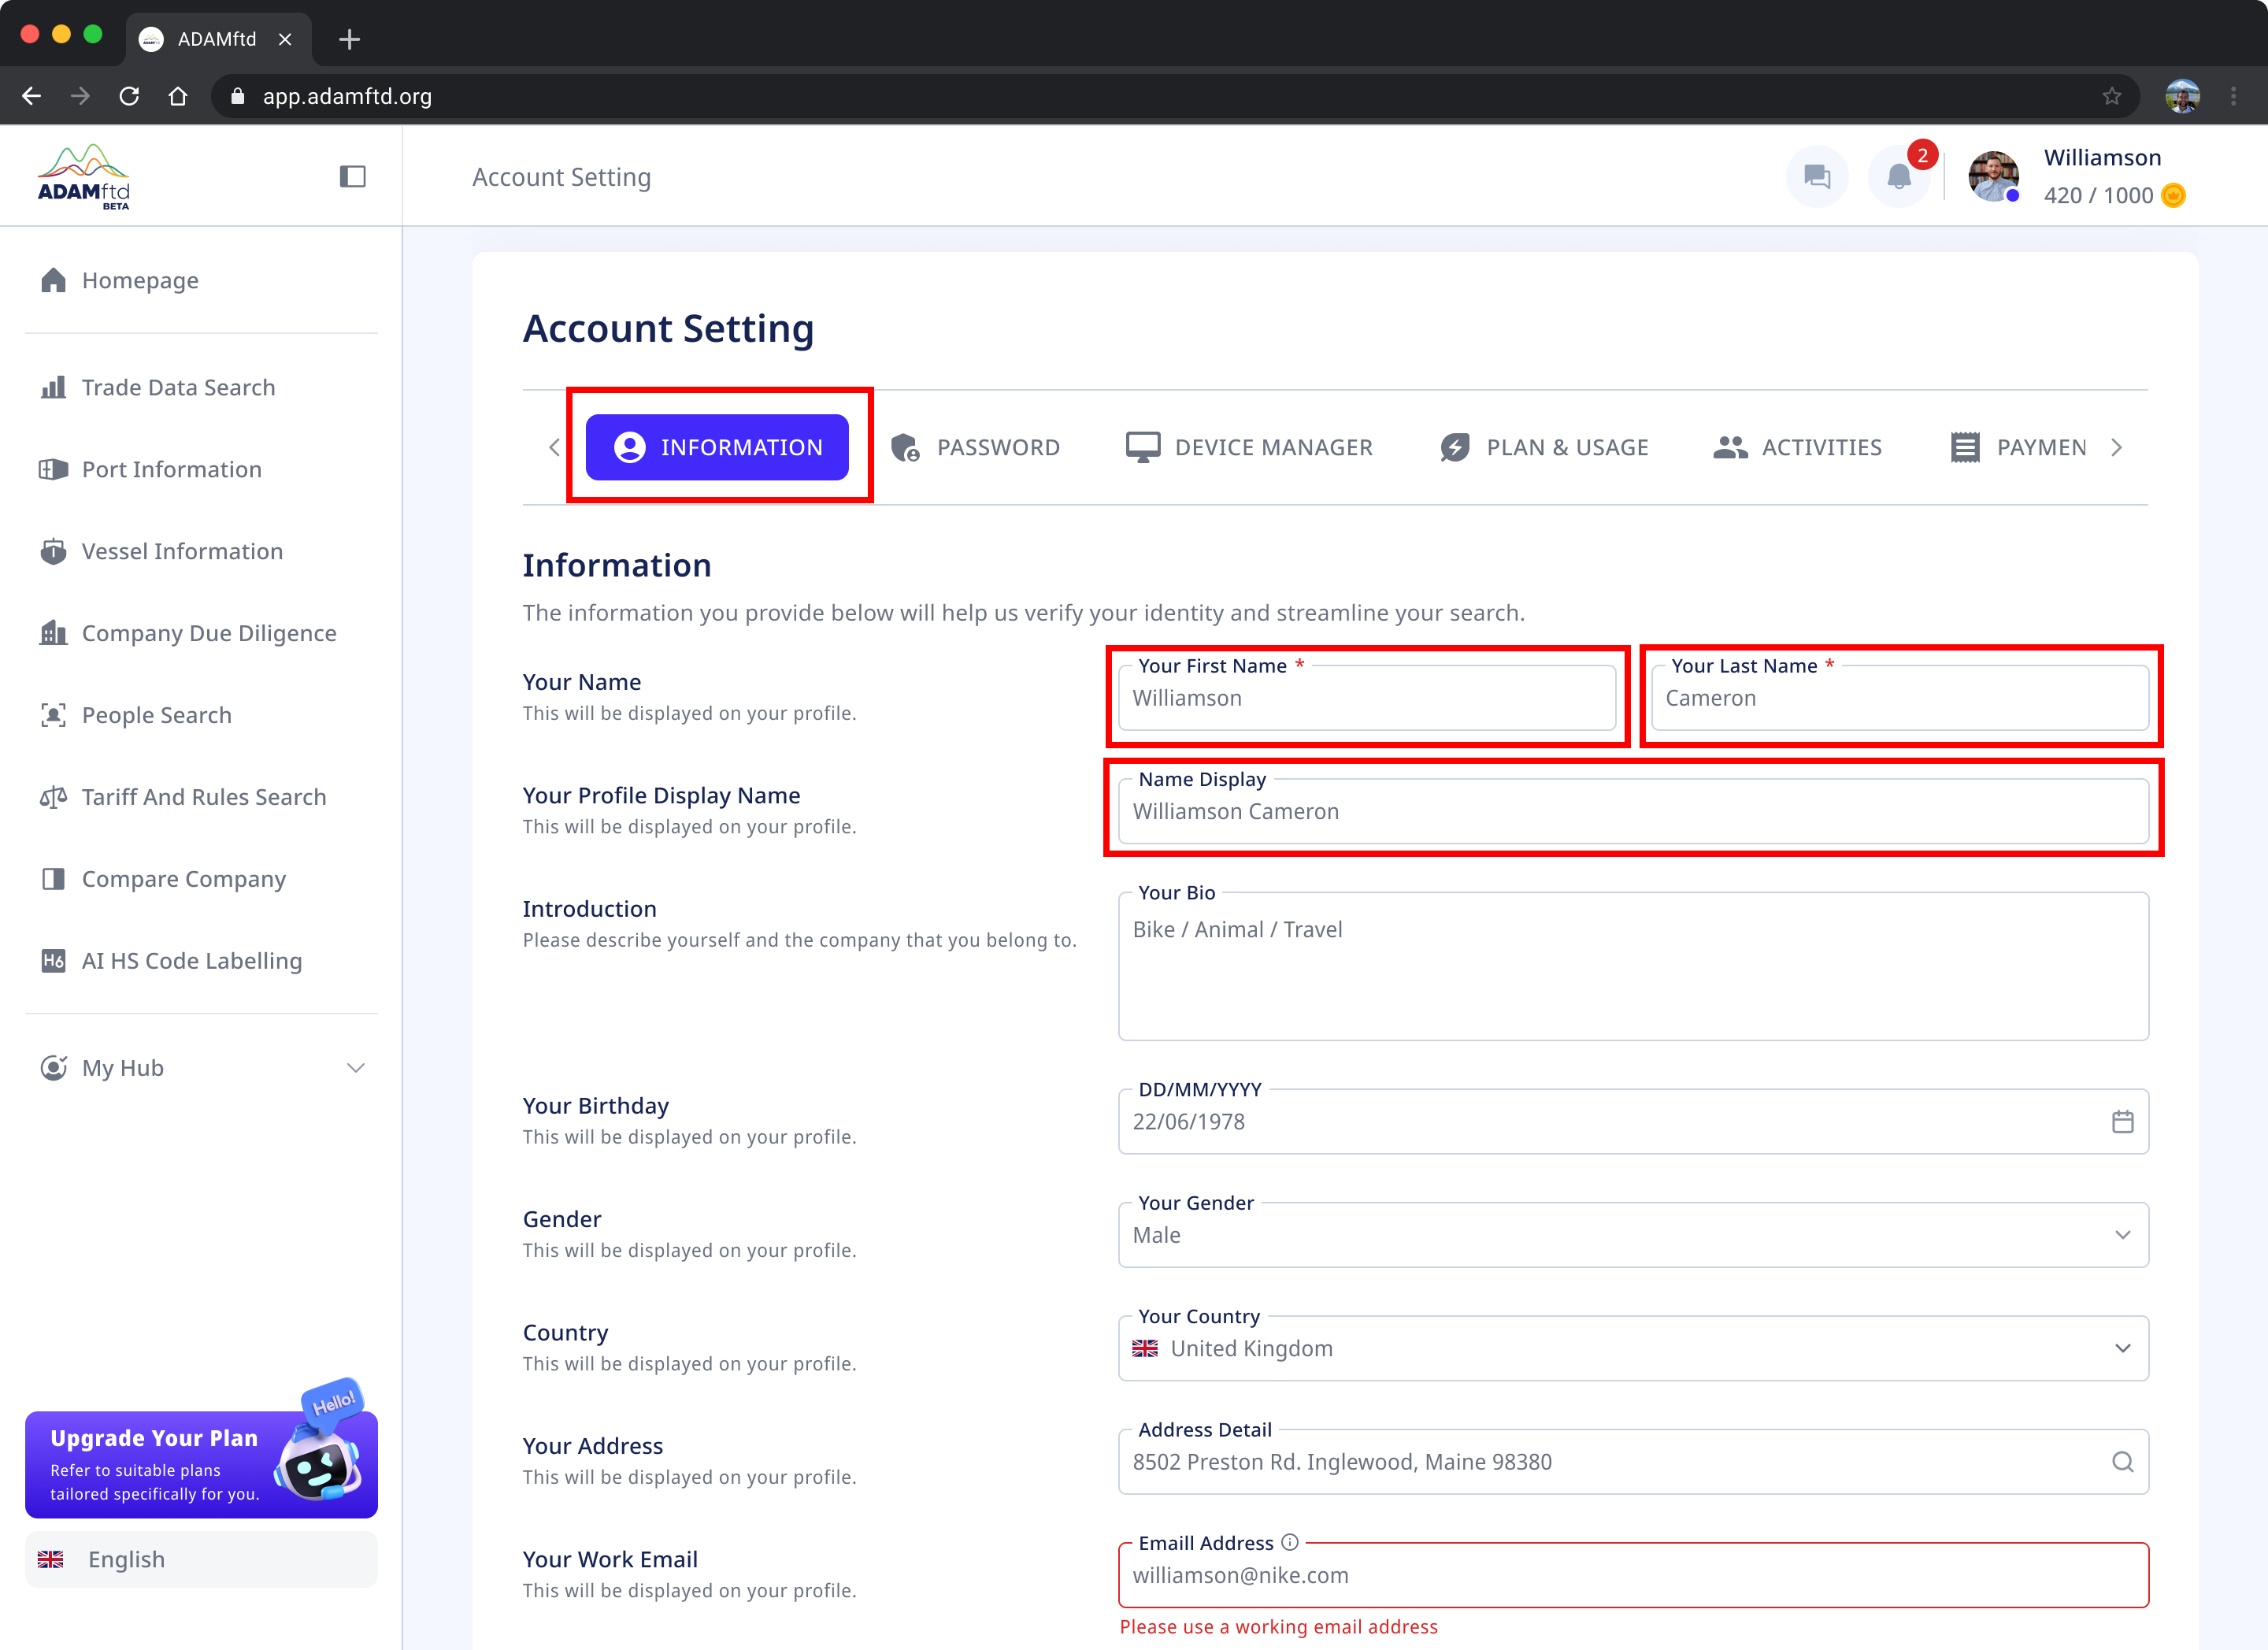
This article guides you through the simple process of updating your first name, last name, and profile display name in your ADAMftd account.

1. Navigate to Account Settings - Ensure you are logged into your ADAMftd account. Click on your profile icon or name in the top right corner to access the dropdown menu. Select "Account Settings" from the options.
2. Select the Information Tab - Once in the Account Settings, make sure you are on the "INFORMATION" tab. This tab allows you to update your personal information.
3. Change Your First Name - Locate the field labeled "Your First Name." Click inside the field and delete the existing name. Type in your new first name.
4. Change Your Last Name - Find the field labeled "Your Last Name." Click inside the field and delete the current name. Enter your new last name.
5. Update Your Profile Display Name - If you want to change how your name appears to others, update the "Name Display" field. Click inside this field and enter your desired display name.
6. Save Changes - After updating your names, scroll down to the bottom of the page and click the "SAVE CHANGE" button to save your updates.
By following these steps, you can successfully change your first and last names, as well as your display name, in your ADAMftd account.